
How To Set Up Your KS3 Cobra Bag Kit
Share
Congratulations on getting your hands on the KS3 Cobra Bag Kit and thank you for your support in doing so! I'll take you through the setup process from the bottom up, starting with the base. Please ensure to wear protective gear when training and read the KS3 Spring Maintenance Guide before getting started.
Setting Up Your Base
The base is the most crucial component and setting it up properly will ensure that your cobra bag performs at its best. There are a number of ways to set up the base, depending on your situation and the add-ons you have purchased.
Check out this in-depth setup video for the latest methods of setting up the base for optimum performance:
Also refer to How To Make a Baseboard for more detailed instructions.
Please Note: the Mast may be quite tight when inserting into the Base. This is a good thing, but may present a challenge when inserting into the base. If that's the case, first mount the base onto the baseboard (or Paddles), then use a screwdriver through one of the top holes in the Mast to help you push it into the base. Watch this video on how this can be done:
Here are the Basics:
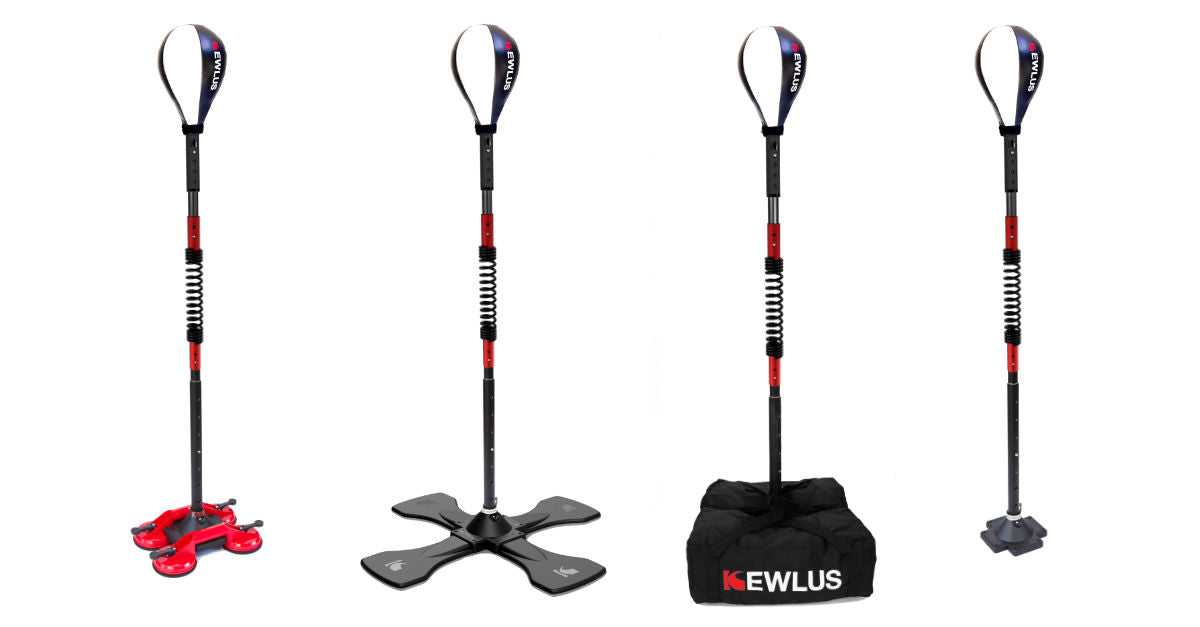
Baseboard + Sandbags
The baseboard option for the base is my favourite option and one I highly recommend for the KS3 Cobra Bag, especially the double-deck option as shown in the video above. Making a 1.5 inch thick, 2 foot-wide baseboard will give you a stable and rigid base. Secure the Multi Base to the baseboard using 8 x 1.5 inch countersunk wood screws. For more details check out the Baseboard DIY page.
The best material to use for your baseboard is an MDF board (chipboard or particle board will also work). If you can't get a thick enough board, simply glue two thinner boards together using liquid nails (type of glue used in construction).
The "Stubby" Baseboard - Add Extra Height & Rigidity
If you don't mind putting in a little extra effort, then consider making the "Stubby" baseboard by gluing together a number of boards. This version offers 5 inches extra height as well as 40 pounds of extra weight for rigidity. The smaller footprint means that you can get close and personal with your cobra bag:
Too hard to DIY?
If you don't want to go to the trouble of making a baseboard, you could always get a local carpenter/handyman/cabinet maker to knock one up for you for a small fee.
For optimum performance I recommend making a second deck using either another smaller baseboard or an olympic weight plate - see the video at the top of the page for the how to.
Platform Paddles + Sandbags
The Paddles are the easiest to set up - simply plug them into the Multi Base and secure them with the central bolt and screws that come with it. The only tricky part is securing the central bolt - do this by: first plugging in two of the paddles; then position the bolt loosely done up; then plug in the remaining two paddles; and finally tighten the bolt using a screwdriver.
Please note that you will need the V2 Paddles if using the KS3 Spring, which are wider and more rigid than the original version.
The sandbags have been designed to provide a total weight of 90 pounds when filled to capacity with sand or gravel. I recommend using gravel, or if using sand place a large garbage bag inside the sandbags to prevent any seepage. You can also add extra weights on top for extra rigidity of the base.
For optimum performance I highly recommend making a second deck using an olympic weight place and wrapping tape around the mast for a snug fit. Alternatively you can use a second set of Paddles and a Multi Base with a second set of sandbags. See the Base Setup video at the top for the how to.
Suction Cups
The Suction Cups option is also one of my favourites, although they really only work on a smoothly painted surface such as a painted garage floor (and some tiled surfaces). The suction cups are great for the shortened version of the cobra bag and ideal for small children due to their low profile.
For an enhanced version I recommend placing a set of sandbags on top and an olympic weight plate for a second deck. See the Base Setup video at the top for details.
Screwed to the Floor
If you have an option to be able to screw the Multi Base to a floor, such as a concrete garage floor or a wood deck outside, this would be the cleanest and sturdiest option. Not only will it give you the best rigidity, but there would also be no sandbags to have to step around.
For a concrete floor you will need to drill out 8 holes, using the Multi Base as a template and insert plugs to match the size of your screws. For the screws I recommend using 1.5 inch long, countersunk screws.
If you need to pre-drill pilot holes to attach the base, use this Multi Base PDF template file as a template for marking the holes. Important note: make sure to print at 100% scale or the holes will not line up. Double-check the printout against the Multi Base or alternatively use the Base itself to mark up the holes.
Boxing Platform (not mentioned in the video)
Although it's not as portable as a baseboard, the Boxing Platform option is a great setup for kids. It's the next best thing to screwing the Multi Base to the floor. This is a very low profile solution, which will allow you or your kids to get right up close to the cobra bag without bumping into sandbags or other weights.
Watch the video below for details on how to make such a platform and also to see it in action:
KS3 Spring Check & Maintenance
The KS3 Spring comes with two red connectors that have been screwed into the spring and locked in place with an adhesive. Please check each connector to ensure it's locked in place and does not unscrew prior to clicking it onto the mast.
Important: Please read the KS3 Spring Maintenance Guide prior to using the KS3 Cobra Bag Kit.
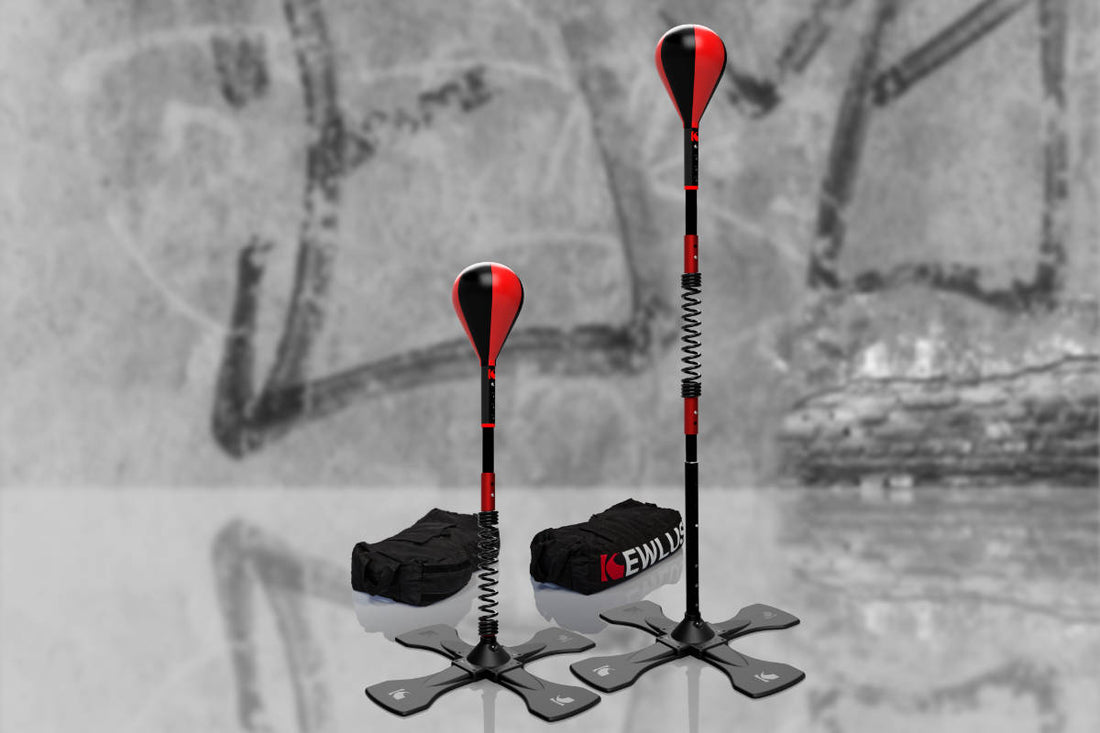
Shortened Cobra Bag Option
The KS3 Spring is able to be plugged directly into the Multi Base for a shorter Cobra Bag option ideal for smaller kids or for mounding the cobra bag on a wall or ceiling. There are no push buttons on the KS3 Spring, so simply push it into the Multi Base as far as it goes and secure it in place using the steel clamp around the collar of the Multi Base.
Note: Do NOT twist the spring counter-clockwise as this may unscrew one of the red connectors on the spring. If you use twisting motion to help insert or take out the spring, always use clockwise twisting motion - both for inserting onto the Multi Base, and for pulling it out.
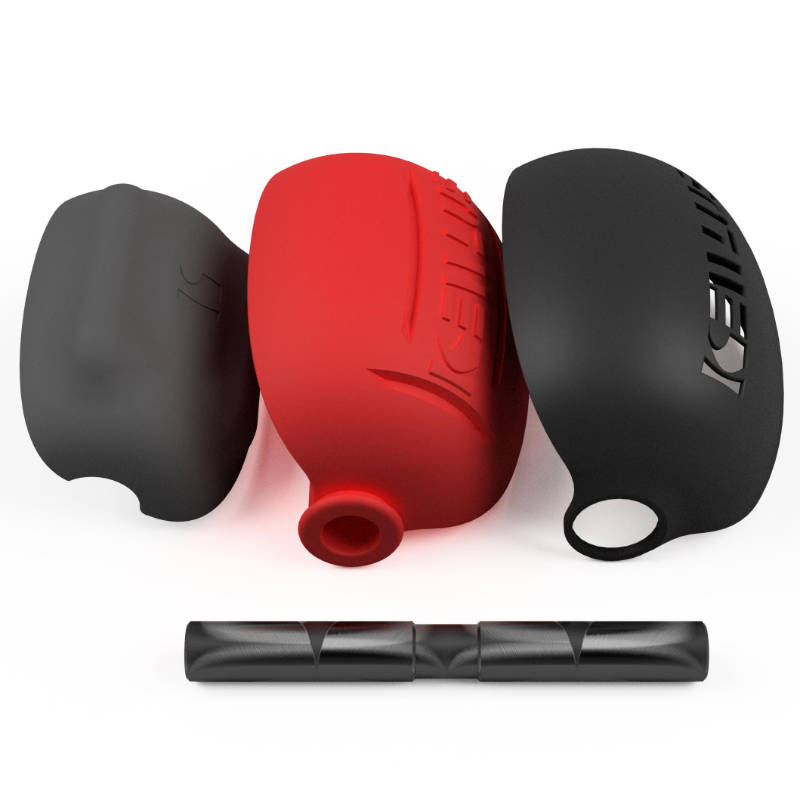
Setting Up the Ball
The final stage of the setup is to insert the Cobra Bag Adapter into the Cobra Bag Ball, lace up the ball and inflate it. I recommend wetting the inflation needle on your pump whenever you inflate the ball as it will give you the longest inflated time between top-ups. If you're using the cobra bag daily, I recommend topping up the air every three days or if you notice reduced firmness of the ball.
CAUTION: Please do not use a compressor to inflate the ball as it is likely to burst.
The setup process is best explained using a video:
Please ensure the ball is fully inflated when using it. Poorly inflated ball can lead to the adapter breaking.
Making Adjustments
There are a number of adjustment points on the Kewlus Cobra Bag. In general, and when starting off, you want the ball to be at about chin level. As you take up the boxing stance, parting your feet and slightly bending your knees, the centre of the ball will be at the correct level for punching.
When you're starting off I recommend extending the top section of the cobra bag (the section above the spring) to the maximum length possible and adjusting the bottom section to match your height. This will give the cobra bag the longest reach and the slowest speed - ideal for starting off.
As you get used to the motion of the bag, reduce the top section and increase the bottom to match your height. Reducing the length of the top section will increase the speed, making it more challenging to hit the ball accurately.
Start Training
Join me in cobra bag training sessions!