

Classic (KS2) Freestanding Kit
Share
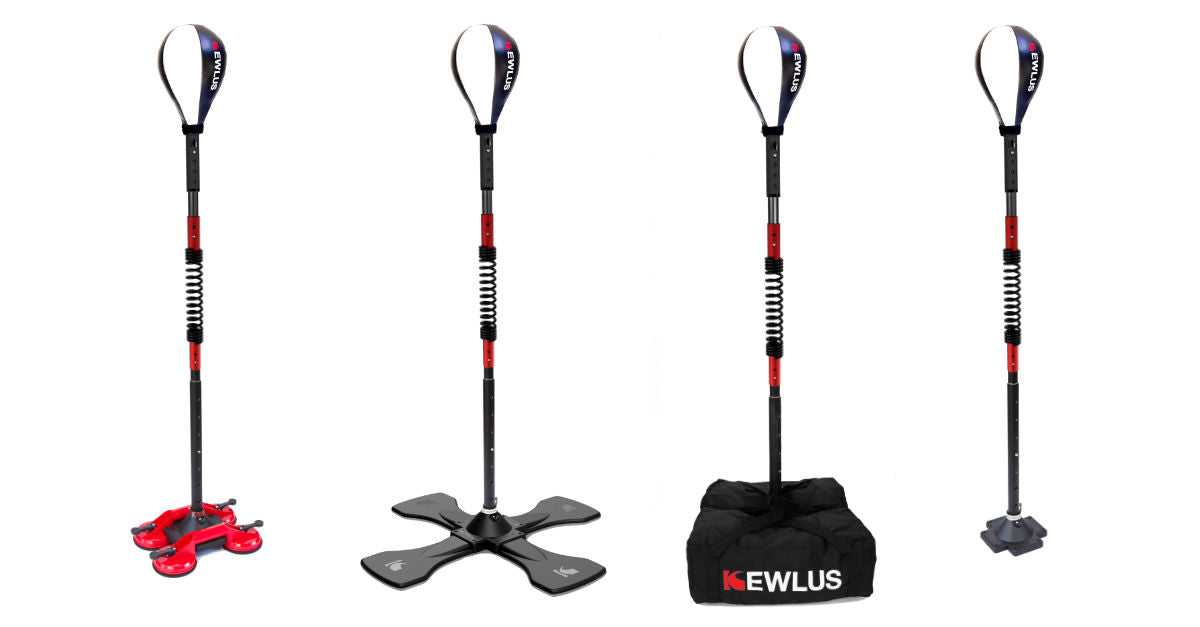
The Classic (KS2) Freestanding Kit combines the controlled, responsive rebound of the KS2 Spring with a compact freestanding base that requires no DIY construction. It is an excellent starting point for anyone who is new to reflex-bag training, while the modular design allows individual components to be upgraded as your training progresses. The Platform Paddles can also be completely disassembled when needed for travel.
View ProductTarget Ball: The Classic Target Ball is made from lightweight synthetic material, designed to complement the controlled and responsive rebound of the KS2 Spring. Its shape is engineered specifically to match the KEWLUS Target Adapter, creating a secure connection and a reliable rebound feel. The modular system also allows targets to be swapped in seconds as your training requirements evolve.
Spring: The Classic (KS2) Spring is the second-generation KEWLUS spring, designed to provide a manageable yet responsive rebound. It is an excellent choice for developing timing, accuracy and coordination, particularly for anyone who is new to cobra-bag training. The KS2 Spring can later be upgraded to a Prime (KS3) Spring when you are ready for a faster and more demanding rebound.
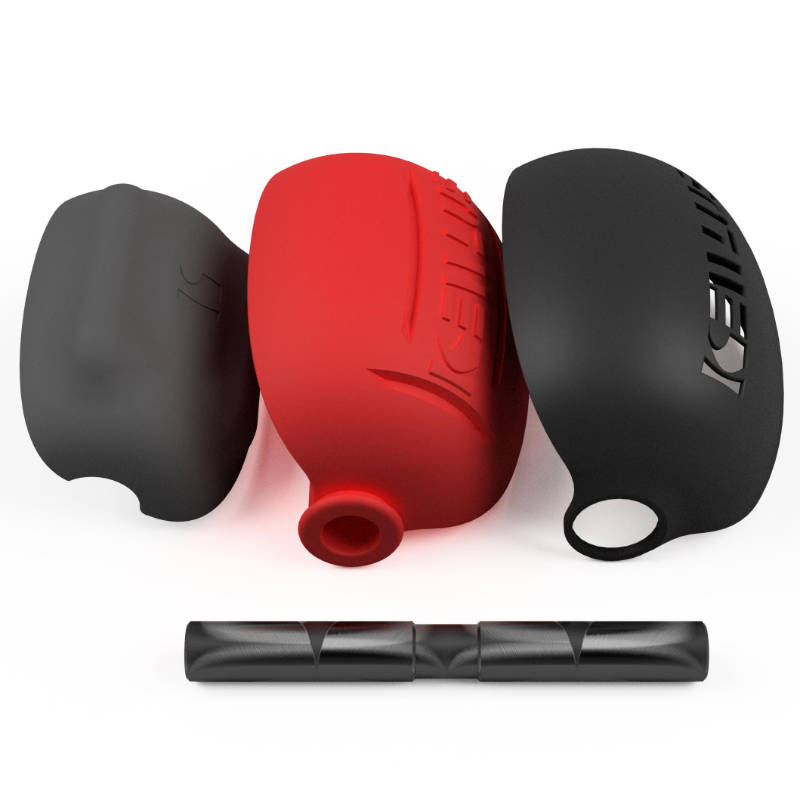
Base & Mast: The Platform Paddles create a compact freestanding base without the need to make a DIY platform. Made from strong composite-fibre material, they can be completely disassembled when the kit needs to be transported. Combined with the lightweight, rust-free Alloy Mast and included sandbags, they create a versatile platform for home training. The included Olympic Weight Plate Sleeve can also be used with your own Olympic plate to increase rigidity and further improve rebound performance.
Assembly Instructions
The instructions below will help you correctly assemble the Classic (KS2) Freestanding Kit for optimum performance.
Step 1: Assemble the Platform Paddles with the Base Connector
The first step is to assemble the Platform Paddles with the Base Connector to form the freestanding platform of your cobra bag. Correct assembly of the Paddles is important for reliable performance.
You will need the following:
- A set of 4 Platform Paddles, supplied with a bag containing 8 small black screws and one large chrome screw and nut;
- The Base Connector, supplied with a steel clamp that fits around its collar; and
- Your favourite Phillips screwdriver, which is not provided.
If the Mast is already inserted into the Base Connector, remove the steel clamp from around the collar. Press both buttons on the Mast firmly while twisting and pulling the Mast out of the Connector. To make this easier, place the Base Connector on the floor and stand over it with your feet partly over the sides to hold it down.
If the Mast feels too tight, you can insert a screwdriver through one of its top holes for extra leverage. Make sure that you continue pressing both buttons firmly while twisting.
Hold the Base Connector upside down and insert two of the Platform Paddles loosely into it. Thread the chrome nut partly onto the chrome screw and position it in the centre of the Paddles, with the screw head on the outside and the nut on the inside.
Insert the third and fourth Paddles, sliding each one underneath the screw head. Push all four Paddles fully into the cavity of the Base Connector, then tighten the chrome screw. Use your finger on the inside of the Connector to stop the nut from spinning until it finds grip.
Once the Paddles are securely in place, insert the 8 black screws through the top of the Base Connector and into the Paddles. Do not overtighten them. They should be hand-tight and sit relatively flush with the top surface.
Step 2: Insert the Mast & Tighten the Steel Clamp
Place the assembled platform on a firm, level floor. Insert the Mast into the Base Connector while pressing both push buttons. Push it all the way in and twist it until the buttons pop out through the holes in the Connector.
Tip: If the fit is very tight, insert a screwdriver through one of the top holes in the Mast and use it as leverage while twisting.
Once the buttons have popped out through the holes and the Mast is firmly in place, position the steel clamp around the collar of the Base Connector and tighten it as firmly as you can by hand. Check that the Mast feels rigid.
From time to time, check the clamp around the collar to make sure it remains tight. The rigidity of the Mast has a direct impact on the performance of your cobra bag.
Step 3: Insert the Aluminium Click Bar into the Mast
Insert one end of the Aluminium Click Bar into the top of the Mast while pressing both buttons on the Click Bar. Slide it down until the buttons pop out through a pair of adjacent holes in the Mast.
Selecting different pairs of holes allows you to adjust the overall height of your cobra bag.
Step 4: Attach the Spring End Covers & Mount the KS2 Spring
The Classic (KS2) Freestanding Kit includes a pair of black rubber Spring End Covers. Screw one cover onto each end of the KS2 Spring until the end of the spring coil touches the far end of the rubber cover. You can feel for the end of the coil with your index finger.
Slide the lower Spring End Cover onto the Aluminium Click Bar until the push buttons pop out through the holes in the cover.
The connection is deliberately quite tight. If needed, apply a small amount of olive oil to the inside rim of the rubber cover and rotate the Spring clockwise as you slide it onto the Click Bar.
Important: Always rotate the Spring clockwise when inserting or removing the bars. Clockwise rotation opens the coils, making the process easier and protecting the Spring End Covers.
Alternative Setup: The Spring End Covers give the KS2 Spring a clean appearance and allow the bars to click securely into place, but they are optional. You can also insert the Aluminium Click Bar directly into the Spring and secure it with stretchy duct tape.
The taped method allows you to fine-tune the rebound speed by adjusting how far the bars extend into the Spring. Inserting the bars further into the Spring creates a faster rebound. Make sure that you leave at least 5 active spring coils between the upper and lower bars.
Step 5: Insert the Polymer Red Bar into the Top of the KS2 Spring
Insert the Polymer Red Bar into the upper Spring End Cover until the push buttons pop out through the holes in the cover.
The Polymer Red Bar is shorter and lighter than the Aluminium Click Bar, helping the Classic (KS2) setup deliver a faster and more responsive rebound.
If you are using the alternative taped setup without a Spring End Cover, insert the Polymer Red Bar into the top of the Spring until the push buttons are touching the coil, then secure the connection firmly with stretchy duct tape.
Step 6: Assemble the Classic Target Ball & Target Adapter
Open the Velcro strap at the opening of the Target Ball and unzip it all the way, revealing the bladder and the protective tongue. The tongue is there to reinforce the zip.
The tongue is designed to sit flat between the diaphragm of the Target Adapter and the zip, so pull the tongue out as you insert the Adapter. Make sure that the bladder is sitting inside the diaphragm of the Adapter and that the tongue is on the outside, immediately underneath the zip.
It is deliberately a tight fit. Push the outer edge of the Adapter diaphragm in with your thumb, slowly working your way around until the entire diaphragm is inside the Target Ball.
Once it is fully inserted, adjust the position so that the tongue sits on the outside of the diaphragm, then pull the zip down as far as it will go.
Note: With some targets, the zipper may not close all the way. To prevent the zipper clasp from sliding back up, I recommend securing the bottom with electrical tape.
Using a ball pump with a wet needle, which is not provided, inflate the Target Ball about halfway. Squeeze the ball gently and feel around it to make sure that the bladder is sitting centrally and has not become caught on the edge of the diaphragm.
Do not twist the Target Adapter, as this may twist the bladder inside the ball. Once you are satisfied that nothing is caught or twisted, inflate the ball fully until it feels firm but not rock-hard. It is important not to over-inflate it.
Mount the assembled Target Adapter onto the Polymer Red Bar. The Adapter has several pairs of holes in its stem, allowing you to adjust the reach of the cobra bag.
Step 7: Fill the Sandbags to Weigh Down Your Cobra Bag
Your cobra bag will perform best when the Platform Paddles are properly weighed down. Each included sandbag is designed to weigh roughly 45 pounds (20kg) when completely filled with sand.
I strongly recommend lining the inside of each sandbag with a large, heavy-duty bin liner bag to prevent sand from seeping through the stitched seams.
As you fill each bag, push the sand out towards the far corners and lift the bag occasionally to allow the sand to settle. Fill the bag all the way to the top so that it becomes slightly bulging, then tie the liner bag loosely and close the Velcro flaps.
Place one filled sandbag across two of the Platform Paddles, immediately next to the Mast. Secure the Velcro handle straps around the Mast to prevent the bag from sliding off during training. Place the second sandbag on the opposite side in the same way.
Tip: More weight will improve the performance of the cobra bag. Wet sand is ideal because it makes each sandbag approximately 20% heavier. The combined weight should be at least 90–100 pounds for solid performance. If you need additional stability, you can also add a second pair of sandbags on top of the first pair.
Optimum Tip: Using Olympic weight plates above the sandbags is an excellent way to increase not only the overall weight, but also the rigidity of the Mast. The included Olympic Weight Plate Sleeve slides onto the Mast and holds one or two of your own Olympic weight plates securely in place. Because the plates brace the Mast at a higher point, they can greatly enhance the performance of your cobra bag.
Make sure to check out my YouTube channel for more tips and ideas, as well as training videos and the latest add-ons. I hope you enjoy your KEWLUS cobra bag. If you have any questions, you can use the Contact Page to get in touch with me.